
Showing posts with label sweets. Show all posts
Showing posts with label sweets. Show all posts
Saturday, January 21, 2012
Winter Cupcakes
I found "edible snowflakes" at Joann's and decided they were a must! So I instantly knew I was going to make cupcakes with them for our family Christmas dinner at my Mother in laws house. Below is the picture. I didn't really do anything special, I literally did these "semi-homemade" sytle! Box cake mix, purchased the blue cupcake papers at Target and a canned frosting. What I DID do was sift powdered sugar and add some vanilla, almond extract and some butter to the canned frosting so it would have more of a smooth, homemade flavor. (I cheated!) After the cupcakes were baked and cooled I put the frosting into my handy dandy Pampered Chef Easy Accent Decorator and went to town! My five year old helped me by putting the snowflakes on and then I dusted with the baby blue disco dust...these were a hit!


Brownie Pops
Recently a family member asked me for a Dr. Seuss inspired favor for a babyshower, this is what I came up with:

(I've posted before about these)
I made these a little bit bigger than I have before because I've recently discovered that if you dip the stick in the chocolate then insert into the brownie, I can cover the entire thing in chocolate. The biggest challenge with these was to make them NOT look like they were for a 4th of July party but rather a baby shower for a boy. Needless to say the Hostesses were delighted with them!
I had some extra supplies left over so I decided to finish off what I had left and came up with these:

(Cookies n Cream, Rainbow Sprinkles and Baby Blue Disco dust)
I did these for our Super Bowl party last year....TOUCH DOWN!


(I've posted before about these)
I made these a little bit bigger than I have before because I've recently discovered that if you dip the stick in the chocolate then insert into the brownie, I can cover the entire thing in chocolate. The biggest challenge with these was to make them NOT look like they were for a 4th of July party but rather a baby shower for a boy. Needless to say the Hostesses were delighted with them!
I had some extra supplies left over so I decided to finish off what I had left and came up with these:

(Cookies n Cream, Rainbow Sprinkles and Baby Blue Disco dust)
I did these for our Super Bowl party last year....TOUCH DOWN!

Saturday, May 7, 2011
Gourmet Strawberries

With tomorrow being Mother's Day I wanted to have a brunch for a few special women, my Mom, Mother in law, my Hubby's Grandmother and my Sister in law....well, do to circumstances beyond my control, things changed.
Hubby and I surprised our 4 year old Thursday with a trip to Legoland and as we drove to our destination I saw a strawberry stand and told Hubby that if they were still open when we left we would HAVE to get strawberries there....and we did. I scored big time! Three baskets for $9.50 and they are big and dark red and juicy!
Last night I went for it turned out these!!! I think they turned out great and only hope they taste as good as they look...
On the left is chocolate covered in mini chocolate chips, to the right of that is chocolate sprinkled in coconut, to the right of that is chocolate drizzled with white chocolate, next to that is white chocolate coconut and then last is white chocolate drizzled with milk chocolate.
Saturday, February 5, 2011
Irish Car Bomb Cupcakes
When hubby and I finally decided to host a super bowl party, I went on the prowl for an awesome cupcake to serve! I wanted something that was "manly" and GOOD! I found a few recipes online and settled on this one from Annie's Eats. I love the cake and the ganache but the frosting is VERY sweet and I just do not like the grainy texture. I did NOT use as much Bailey's as it called for in the frosting. I did add a bit more powdered sugar and about 4 more tablespoons of butter. I also added a few tablespoons of milk and just a splash of vanilla. I'm "happy" with the frosting but next time will use my Grandmother's recipe and substitute the almond for the Bailey's.
The cupcakes out of the oven
 Ganache filling
 Cupcakes filled w/the ganache
Final product!

Saturday, January 22, 2011
Valentine's
I was searching for a Valentine's idea that was simple that I could make for my son's daycare class. I came across this....
I set out to find all the materials and had better luck than I thought! I already had the glue so I purchased 2 bags of the Valentine's Tootsie Pops, 1 package of card stock at Michael's, 2 packages of the google eyes at Michael's and the felt heart stickers I found in the dollar section at Target. This whole project is under $20 and I think its better than any of the pre-fabricated Valentine's sold in the boxes. I was looking at the Star Wars ones for my son then decided these would be better!

I started by loading my printer with the color card stock and printing the pattern from the above website. I then cut the all out and I did NOT take my time to make them perfect, I think they have more character this way. The guides provided for the slits for the sucker stick are a bit small so I cut mine a bit longer and then secured the sucker with a small piece of tape to prevent it from sliding out or turning. I then decorated the butterflies with the stickers and then inserted the suckers then glued on the eyes. Finished product, what do you think?

I set out to find all the materials and had better luck than I thought! I already had the glue so I purchased 2 bags of the Valentine's Tootsie Pops, 1 package of card stock at Michael's, 2 packages of the google eyes at Michael's and the felt heart stickers I found in the dollar section at Target. This whole project is under $20 and I think its better than any of the pre-fabricated Valentine's sold in the boxes. I was looking at the Star Wars ones for my son then decided these would be better!

I started by loading my printer with the color card stock and printing the pattern from the above website. I then cut the all out and I did NOT take my time to make them perfect, I think they have more character this way. The guides provided for the slits for the sucker stick are a bit small so I cut mine a bit longer and then secured the sucker with a small piece of tape to prevent it from sliding out or turning. I then decorated the butterflies with the stickers and then inserted the suckers then glued on the eyes. Finished product, what do you think?

Tuesday, January 18, 2011
Banana Bread (Muffins)

I had a few bananas that I carted around with me this weekend for snacks and we never ate them. Well because they were in the heat, they started to brown. Rather than throw them away, I decided to make banana bread with them. Here is the recipe I found HERE:
Banana Bread Recipe
Ingredients;
3 or 4 ripe bananas, smashed
1/3 cup melted butter
1 cup sugar (can easily reduce to 3/4 cup)
1 egg, beaten
1 teaspoon vanilla
1 teaspoon baking soda
Pinch of salt
1 1/2 cups of all-purpose flour
No need for a mixer for this recipe. Preheat the oven to 350°F (175°C). With a wooden spoon, mix butter into the mashed bananas in a large mixing bowl. Mix in the sugar, egg, and vanilla. Sprinkle the baking soda and salt over the mixture and mix in. Add the flour last, mix. Pour mixture into a buttered 4x8 inch loaf pan. Bake for 1 hour. Cool on a rack. Remove from pan and slice to serve.
Note; instead of baking a loaf, I put it into cupcake liners and made muffins. These only need to bake about 30-35 minutes, NOT an hour. And I only used 3 bananas, not 4.
Banana Bread Recipe
Ingredients;
3 or 4 ripe bananas, smashed
1/3 cup melted butter
1 cup sugar (can easily reduce to 3/4 cup)
1 egg, beaten
1 teaspoon vanilla
1 teaspoon baking soda
Pinch of salt
1 1/2 cups of all-purpose flour
No need for a mixer for this recipe. Preheat the oven to 350°F (175°C). With a wooden spoon, mix butter into the mashed bananas in a large mixing bowl. Mix in the sugar, egg, and vanilla. Sprinkle the baking soda and salt over the mixture and mix in. Add the flour last, mix. Pour mixture into a buttered 4x8 inch loaf pan. Bake for 1 hour. Cool on a rack. Remove from pan and slice to serve.
Note; instead of baking a loaf, I put it into cupcake liners and made muffins. These only need to bake about 30-35 minutes, NOT an hour. And I only used 3 bananas, not 4.
Saturday, December 18, 2010
Cookies/Brownies in a JAR!

 A long time ago a girlfriend and I saw these and the Internet was no where near as big as it is today....so we had NO idea what we were doing and could not just "Google" it. So we set out to "do it ourselves" and ended up making huge messes and broken jars. To this day I still do not know if anyone ever made the cookies or just kept the jar for looks.
A few years ago I was at my local cake supply store and found a recipe book for "Cookies in a jar" and since it was only a few buck, I picked one up. Clearly it was done by one of the ladies that worked there or someone she knew and they decided to sell it for her....anyway, I forgot I had it till I came upon it a few weeks ago! SCORE! I remembered my Mom saying that I had some jars left over at her place and she brought them to me and there were eight jars. Hubby grabbed three bags of plain red/green M&M's from the store and off I went making jars for co-workers and my son's teachers. I managed to get four jars of cookies from three bags of M&M's then I was stumped for the fifth jar... I found in the back of the book a recipe for Brownies in a Jar and I did not have enough of the nuts so I substituted with the remaining M&M's and so the brownies will have walnuts and M&M's, YUM!
You use quart size jars and the book says "wide mouth" but I did not have those so I used what I had and everything fit. You layer the ingredients in order and then make your tags and you are done!
Cookies in a Jar
1 1/4 C granulated sugar
1 1/4 C plain M&M's
2 C flour mixed with 1/2 tsp baking powder and 1/2 tsp baking soda
layer in jar in order
attach tag that says the following
1-Empty jar of cookie mix into large mixing bowl
Use your hands to thoroughly blend mix
2-Add; 1 stick of butter, 1 egg and 1 tsp vanilla
3-Mix until completely blended, you will need too finish mixing with your hands
4-Shape into balls the size of walnuts, place 2" apart on sprayed baking sheets
5-Bake at 375 for 12-14 minutes until edges are lightly browned. Cool 5 minutes on baking sheets then remove cookies to racks to finish cooling.
Makes 1 1/2 dozen
Brownies in a Jar
2 1/4 C sugar
2/3 C cocoa powder
3/4 C chopped nuts
1 1/4 C flower mixed with
1 tsp. baking powder
1 tsp salt
Layer in jar in order
Attach tag that says the following
1-Empty jar of brownie mix into large mixing bowl.
Use your hands to thoroughly blend mix.
2-Add: 1 1/2 sticks butter or margarine melted
4 eggs, lightly beaten
3-Mix until completely blended
4-Spread batter in a sprayed 9"x13" baking pan
5-Bake at 350 for 30 minutes. Cool completely in pan. Cut into 2" squares.
Makes 2 dozen
Sunday, October 24, 2010
Creepy Finger Cookies

A girl at work made these last year and hers were so good I took a picture of one with my phone and sent it to my husband and he actually thought I broke one of MY nails! I remembered she made these and asked her for her recipe so I could make some for my Halloween party this Friday. Here is how they turned out! Not bad for my first attempt. Next time I will use half the salt and make them much thinner because they rise. I may also use the raspberry jam instead of the red piping gel.
Creep Witches' Fingers
Yield: 5 dozen
1 cup butter (softened)
1 cup powdered sugar
1 egg
1tsp almond extract
1tsp vanilla
2 2/3 cups flour
1tsp baking powder
1tsp salt (I'd use 1/2 instead)
3/4 cup almonds sliced
1 tube red decorator gel or raspberry jam
In bowl, beat together butter, sugar, egg, almond extract and vanilla. Beat in flour, baking soda, and salt. Cover and refrigerate 30 minutes. Working with one quarter of the dough at a time and keeping remainder refrigerated, roll heaping teaspoon full of dough into finger shape for each cookie. Press almond firmly into 1 end for nail. Squeeze in center to create knuckle shape. Using paring knife, make slashes in several places to form knuckle.
Place on lightly greased baking sheets; bake in 325 degree oven for 20-25 minutes or until pale golden. Let cool for 3 minutes. Lift up almond, squeeze red decorator gel onto nail bed and pres almonds back in place, so gel oozes out from underneath. You can also make slashes in the finger and fill them with "blood."
Halloween Oreos

I used these for a project at work and decided to make a small arrangement for my Halloween party that is this Friday night. I think they turned out cute!
Halloween Oreos
I used these for a project at work and decided to make a small arrangement for my Halloween party that is this Friday night. I think they turned out cute!
Wednesday, October 20, 2010
Halloween Oreo's
 Another team challenge at work that I get roped into putting together.... I was given one of those cheap plastic cauldrons and told to "fill it." I decided to spray paint it with the same spray paint I used for my candle sticks before my Twilight party. It made the cauldron look more "metal" and gave it a "sparkle" too! The team donated about $45 so I decided to go to Bath & Body Works and "have at it!" I put in some of the Twilight Woods scent in the body lotion, body spray and bath gel then I added the Sweet Cinnamon Pumpkin hand soap and portable scent dispenser. The two smaller bottles in the front are hand sanitizer in a fun Halloween theme. I needed filler so I opted for chocolate covered Oreo's. I found the pumpkin candies at Michael's for $1.99 and went to town. Most popular cauldron wins their choice of a pizza party or ice cream party.
 Friday, September 17, 2010
Chocolate Covered Marshmallows
My niece Lilly just turned three last week and we headed out to Arizona to help her celebrate. I have done chocolate covered marshmallows before but wanted to try something cute and girlie for her birthday. Her party was "Princess and the Frog" themed so I decided I would theme the marshmallow bouquet the same. I collected my supplies; marshmallows, chocolate, sprinkles, sticks, bags, ribbons, pictures, cup and "frog." The marshmallows were a bit tricky but I figured them out and this is the end result. They made it to Arizona and did NOT melt in the heat and everyone loved them!


***Side note, these pictures were taken with my phone so they are not the best. For some reason I failed to take pictures with my actual camera


***Side note, these pictures were taken with my phone so they are not the best. For some reason I failed to take pictures with my actual camera
Chocolate Covered Oreos
I have seen these online and I have been wanting to try them. I first tried round sucker sticks but those were too "fat" and the cookie would not sandwich together properly so I toyed with the idea of double stuffed Ore's. I decided I would not buy anything else and work with what I had so I set my sights on popsicle sticks that I found at Joann's.
Step 1: I stuck the sticks in the cookies.
 Step 2: I spooned the chocolate over the cookies and gently tapped the stick on the side of my bowl to knock off any excess chocolate. I had to perfect this because the very first one I did fell apart and ended up a casualty!

Step 3: I sprinkled with sprinkles and once the chocolate set up I bagged and tied the cookies.

Here is my end result. I think I did a great job for my first attempt at chocolate covered Ore's! I am sure my niece will love them no matter what they look like!


Step 1: I stuck the sticks in the cookies.
 Step 2: I spooned the chocolate over the cookies and gently tapped the stick on the side of my bowl to knock off any excess chocolate. I had to perfect this because the very first one I did fell apart and ended up a casualty!
Step 3: I sprinkled with sprinkles and once the chocolate set up I bagged and tied the cookies.

Here is my end result. I think I did a great job for my first attempt at chocolate covered Ore's! I am sure my niece will love them no matter what they look like!


Saturday, August 14, 2010
My Birthday Cake!
 My wonderful, loving brother made this cake for me! He is "da bomb!" It was banana with the best fondant I have ever tasted! It tasted like marshmallow!
Kabobs anyone?
 I did these for my flip flop luau birthday party. I wanted something simple, fun and tasty for the chocolate fountain. When I was putting them together they smelled sooooo goooood! Needless to say, I made the mistake of putting a tray out with miscellaneous items on it that everyone dipped and ate instead. So these got thrown away. (So sad!)
More things I want to try....
 I was searching for candy buffets for ideas for my son's Star Wars party and found these adorable gum ball flowers. They look super easy and super cute! They would be great for any candy buffet. Maybe if my brother and sister in law are doing a candy buffet for my nieces birthday party, I could give these a try.
  I saw these "bacon and eggs" on a blog when I was searching ideas for a candy buffet. I think these are sooo cute but not sure what occasion I would use them for! Maybe Easter when we do breakfast?
Saturday, August 7, 2010
Pleasures Party
Last Saturday hubby and I were invited to a co-ed Pleasures party. At the last minute I threw this together. I simply carved a 13x9 sheet of cake into the torso of the "body" and then the breasts are Hostess Snowballs that I covered in frosting. It was a huge hit.

I censored the picture but yes there are nipples on this cake!

I censored the picture but yes there are nipples on this cake!
Flip Flop Cookies
I saw this idea online when I searched images of "flip flop cookies." I purchased the cookies a few days ago then today went to Michael's and found the icing and the sprinkles. I chose the Wilton in the tube because I already had the compatible tips from when I made the baseball cupcakes. The hardest part of this whole process was choosing the color icing. My luau birthday party has taken on a pink and orange kinda vibe but there are many colors in the patter for the plates, napkins, etc. I liked the idea of the "swirled" icing so I went with the very girly pink and purple color. I then chose the over sized sprinkles for the accent on the flip flip. I simply screwed the tip on the tube then piped a "V" shape on one end then added the flower sprinkle. ADORABLE! They are sure to be a huge hit tomorrow at my birthday flip flop luau!


Wednesday, July 21, 2010
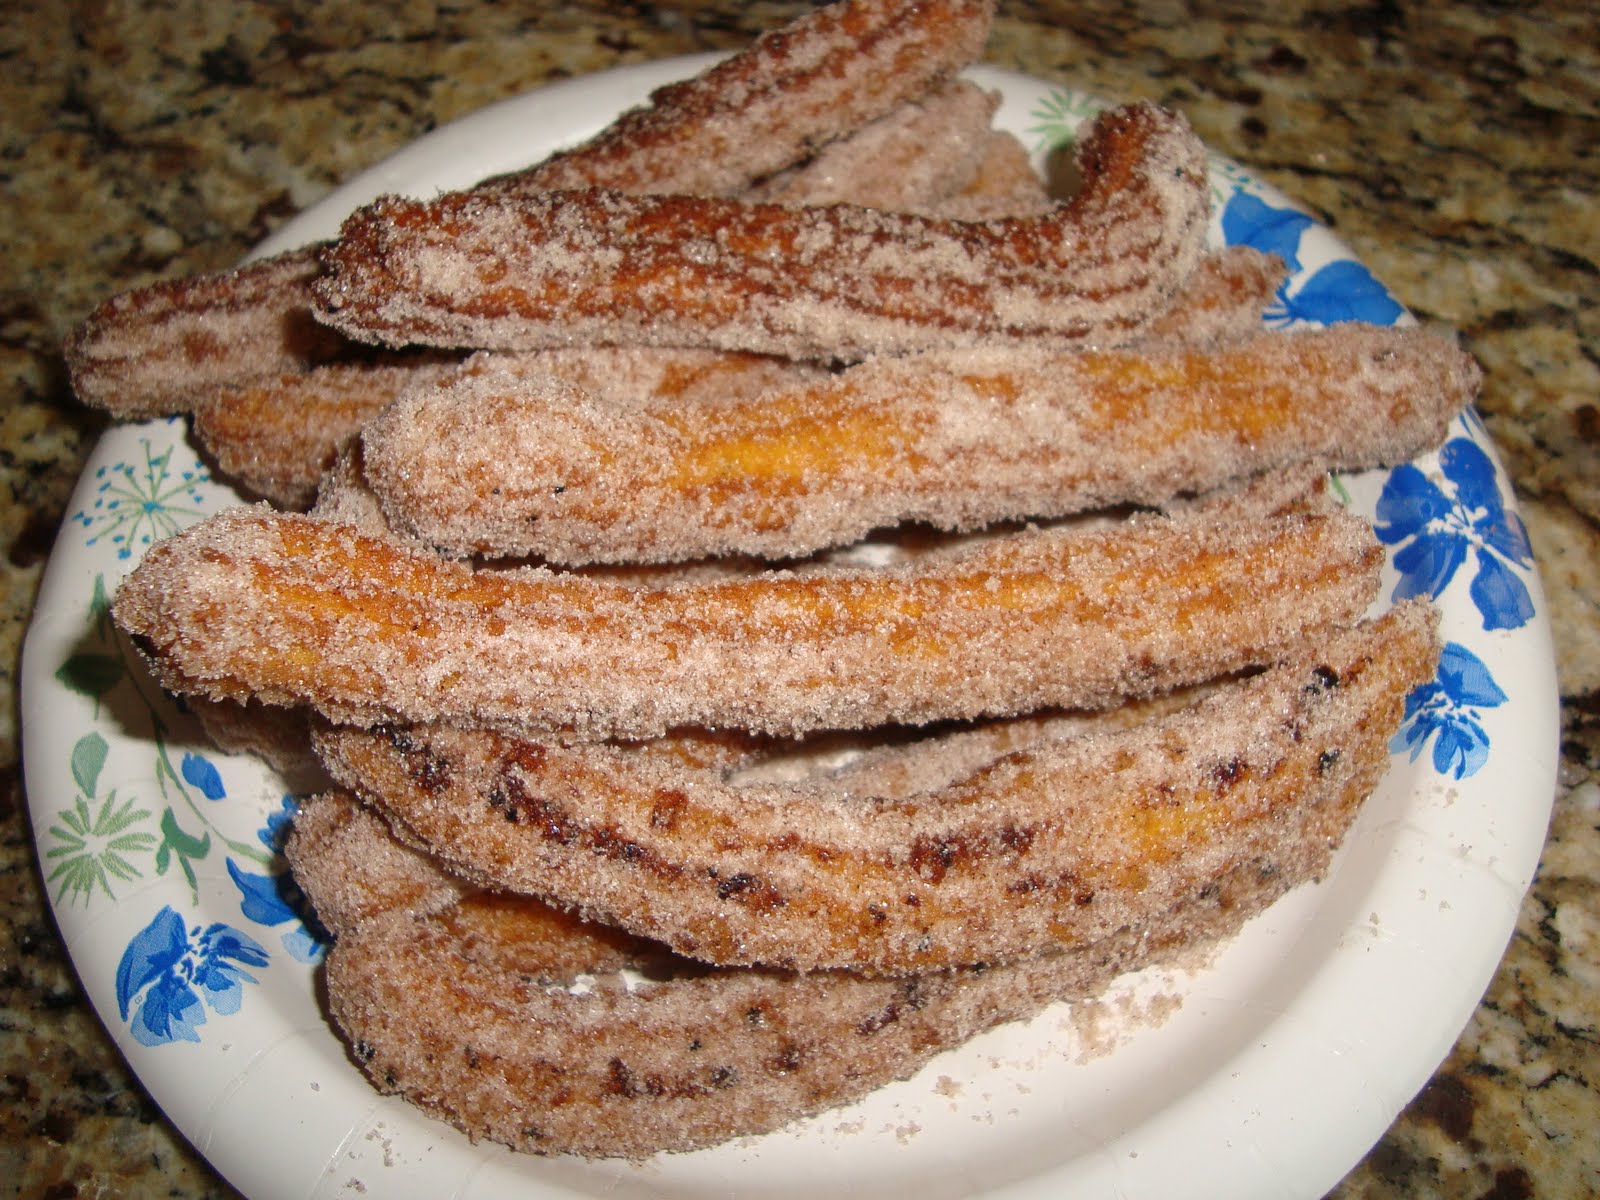
CHURROS!
Okay, so I got this wild "hair" and decided to make these today. They were pretty simple....here are my pictures;
Okay, so the recipe said to use a pastry bag and the star tip and I could not find my star tip then I remembered I had THIS! Its from Pampered Chef and its for frosting and it has a star tip. It worked PERFECT! Just squeeze the handle and out come churros...
 I put the oil in the cast iron pan that we make our taco shells in. This pan as been around for MANY years! It worked great....

When the churros were golden brown, I took them out and rolled them in cinnamon and granulated sugar...

Here is the finished product. I went all out on the plate, I know! I made hubby try them and he said they were good an my three year old asked for another and knew exactly what they were before I even told him! Now he wants to go to Disneyland, lol!

Okay, so the recipe said to use a pastry bag and the star tip and I could not find my star tip then I remembered I had THIS! Its from Pampered Chef and its for frosting and it has a star tip. It worked PERFECT! Just squeeze the handle and out come churros...
 I put the oil in the cast iron pan that we make our taco shells in. This pan as been around for MANY years! It worked great....
When the churros were golden brown, I took them out and rolled them in cinnamon and granulated sugar...

Here is the finished product. I went all out on the plate, I know! I made hubby try them and he said they were good an my three year old asked for another and knew exactly what they were before I even told him! Now he wants to go to Disneyland, lol!
Semi-homemade cupcakes
Tomorrow night is my son's last tee ball game and there will be a pizza party after the game for medals and certificates. I volunteered to bring/make cupcakes and realized I am limited time and in this heat I do NOT feel like baking! I ended up at Sam's Club asking for a box of white cupcakes with white butter cream frosting. I called up my brother and asked for his two cents and together this is what we came up with:
Started with the plain cupcakes that I purchased
 Took the frosting off

Put it in the bowl


Subscribe to:
Posts (Atom)